Form 1: first impressions

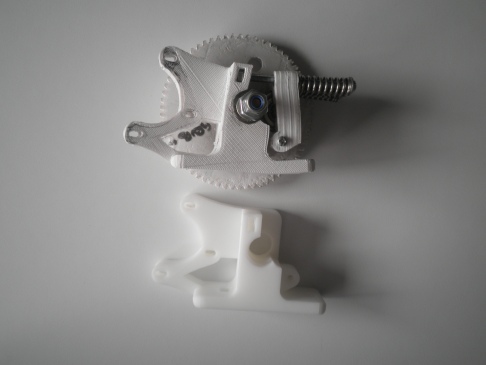
The overall product and software of the Form 1 is a very impressive package. The printer itself is beautifully detailed and proportioned form, in addition to its clean and intuitive layout for ease of use. Likewise, the software is equally well formed and a delight to use, espically compared to the clunky and buggy UP+ printer software. The Form 1 development team obviously have a talented design team who understand the value of creating a good user experience. This is an outstanding achievement, give that this is the first production model of the Form 1 and the first low-cost stereolithography machine on the market. Again a credit to the team behind its development.

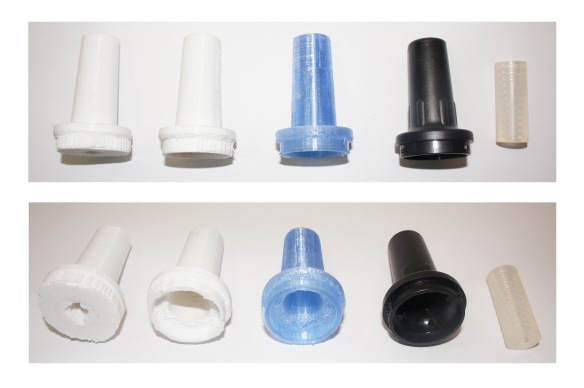
The form 1 has a default resolution of 0.05mm! An extraordinary fine tolerance which promises ‘step’ free surfaces as usually accepted with the filament based printers that we have been testing over the last few years. The less than ideal aspects of this printer are the finishing kit and post print processing. Removing the support material can be tedious and time consuming, as well as using, proportionally, a fair bit of the expensive resin. The clear resin that comes with the product has thankfully a low VOC with slight almond scent, and sets clear with a slight flex. However, parts soon yellow and harden when exposed to sunlight. 

Initial test prints included the Eiffel Tower to see how the lattice structured would render and a Bracelet to see how organic forms render.ImageImageImage

Working with Shapeways

Recently i’ve taken up a job to design some cufflinks for a client in which a logo need to be translated into a 3D form and made into a cufflink. The final work/model has been sent off to a printing service called ‘Shapeways’ facilitating a printing service in a range of materials. In this case the cufflinks are to be printed in a Polished Gold Steel ‘Enrobed in 24k gold and polished to a mild sheen with visible print lines’ The job will take will take around 4 weeks to complete, 2 weeks for the job and another 2 for postage. The job will be great illustration of the quality and precision that can achieve with service. Post will be updated with more pictures and evaluation  on the finished model when print job has been received.

Image

Refining Ultimakers Extruder Gear System

Due to some warping and accuracy issues of parts, print quality of models began to suffer from poor extrusion. Thus it was needed to revise the extruder gear system and re-print parts on another machine. In this case I use the Up!Plus 2 to print the new parts; 60mm/s, 0.15mm layer height, loose in-fill 50%, ABS. The parts turned out perfectly all components accurate with no post processing needed other than removing support structures and no warping.  With help from Katherine Kawecki, we spent a few hours stripping the old system down to reuse the bearings and bolts for the new parts. Documented below is the old system verses the newly printed parts. To note, in order to remove certain parts from the old system it was necessary to melt parts of the housing to free the bearings/bolts, due to adhesives holding components together.

Image

sImageImageImage

Image

Image

OLYMPUS DIGITAL CAMERA

Student Project: Go-Pro Case

Image

Image

by Sunny Raj Singh,

In this project a student needed to test a prototype case design for a Go Pro camera. His assignment was to design a way for the Go Pro camera to be safe when dropped from a high distance, thus printed prototype being used to test impact stress and fit of his design. Print

Print Specifications: Layering: 0.2mm, Temperature: 220 degrees, Infill: 100%, No support structure, Print Speed: 100mm/s

Water Tightness Test

Image

Image

I wanted to explore the applications of FDM process and whether it was able to create water tight models. Due to the layering and infill process used in FDM i was intrigued to see what quality and infill settings would be needed to make a model water tight. The cup model above was printed with 100% infill and a layering of 0.2mm, it was able to hold water but not for long. Unfortunately the model could only contain the water for around 5 minutes before leaks started to appear.

Print Specifications: Layering: 0.2mm, Temperature: 220 degrees, Infill: 100%, No support structure, Print Speed: 85mm/s

Student Project:

Image

Image

Image

Image

Kevin Peng’s Tray Project,

In conducting the research I was also approached by numerous students regarding print jobs for assignments. This was great experience as it illustrated the capabilities of the technology in fabricating jobs for students, which is great insight in understanding what is required by students and thus appropriate these requirements to the new Faculty based digital printing facility.

Print Specifications: Layering: 0.2mm-0.1mm/s (Depending on part), Temperature: 220 degrees, Infill: 30%, No support structure, Print Speed: 105mm/s

Reproducing Products

Image

Reproducing Products

Progress models,

I was able to work with the Cancer Research Facility on campus in reproducing discontinued items/products for the research facility. The job was some what challenging in that the pipe had small necessary details that was required to slot the pipe into the holder. However due to the intricate nature of the sits needed to be replicated and amount of models required, the FDM process wasn’t suited in reproducing the product. Also due to the number of require reproductions of the pipe, it was decided that 3D printing the items wasn’t viable option and other manufacture options should be considered for mass production.

Print Specifications: Layering: 0.1mm, Temperature: 220 degrees, Infill: 70%, Support Structure used, Print Speed: 70mm/s